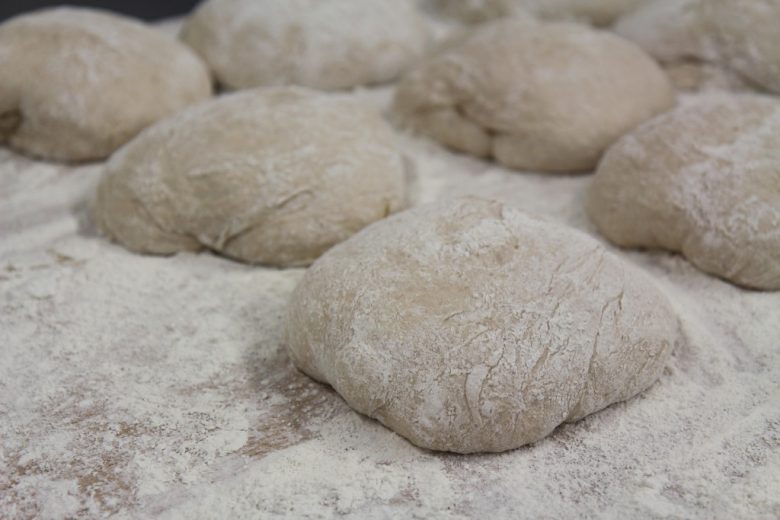
Proofing
The term proofing (“Stückgare” / “Endgare”) refers to the time the shaped dough needs to relax enough so as to enable optimal volume to be achieved during baking.
The proofing duration can be influenced by incredibly different factors:
- Dough hydration level
- Dough temperature
- Dough kneading
- The number/size of the pieces being proofed
- Amount of yeast
- The type, mixture and quality of the flour
- Amounts of pre-dough and sourdough
- Method of sourdough creation
- Whether you use a baking form, a proofing basket or no container for the proof
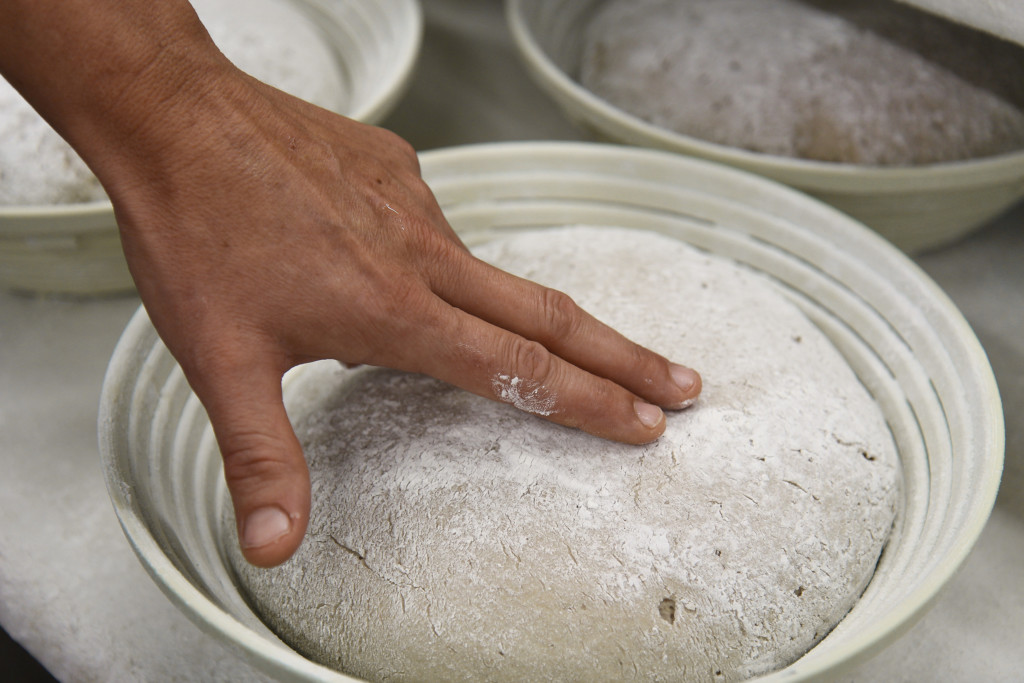
Proofing basket
The size of the proofing basket should correspond to the respective amount of dough! More than anything, proofing baskets should stabilize the form, since doughs like rye, for example, tend to spread outward while proofing.
Proofing baskets should (must) be absolutely hygienic. Due to the moist, warm climate of fermentation, mold can develop on the proofing basket. Bugs and other pests can burrow into the cracks and gaps, consequently contaminating the basket.
How do you determine when something has proofed enough?
Deciding when to put the dough into the oven requires a large amount of expert knowledge. You have the choice between just barely proofed and fully proofed.
Deciding when to put dough in the oven can be determined by pressing down lightly on the dough’s surface with your finger. When the surface fills back in slowly and a light indentation remains visible, then the dough has reached its ideal point in the proofing process for baking.
- Strong resistance
The finger indentation disappears almost completely from the dough’s surface! The dough has not yet proofed enough – the proofing process must continue.
- Little resistance
The finger indentation springs back up by around 5 mm: perfectly proofed – the dough must go into the oven.
- No resistance
The finger indentation becomes larger and barely springs back at all — signs that the dough has already overproofed. It must be baked longer at the higher initial temperature!

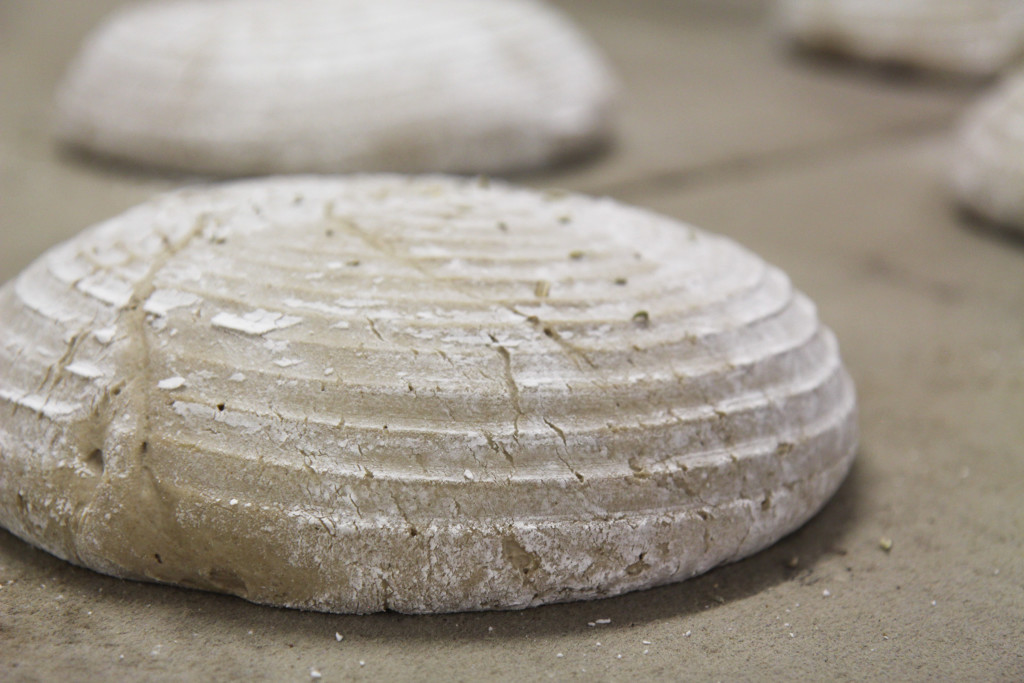
The following photos show a pure rye bread made from a 1-stage sourdough with 0.5% yeast added. In a test, the loaves were put into the oven at 20 minute intervals after being underproofed, just barely proofed and fully proofed.
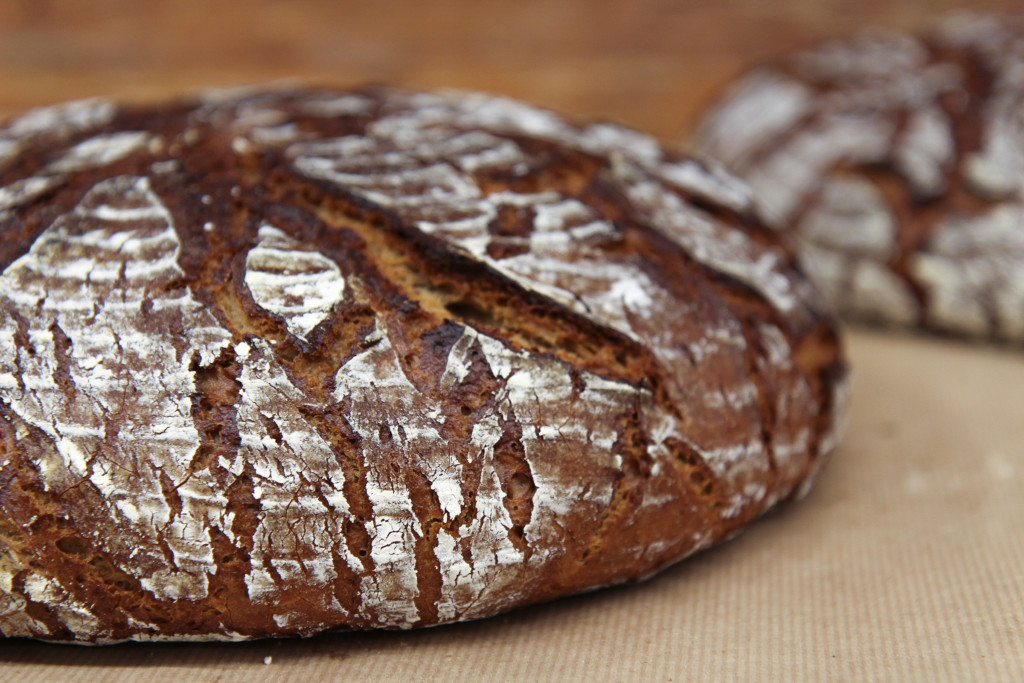
Underproofed:
When underproofed, the dough has not been left to sit long enough. When the surface of the dough is touched with a finger, the indentation from the pressure returns almost entirely to its starting position. Only light cracks are visible on the surface of the dough (c. 1mm-wide cracks)

Effects of underproofing on baked bread:
- Uncontrolled formation of strong and deep cracks on the crust’s surface
- Long cracks at the bread’s bottom
- A tight crumb
- Irregular formation of air pores
- Small volume


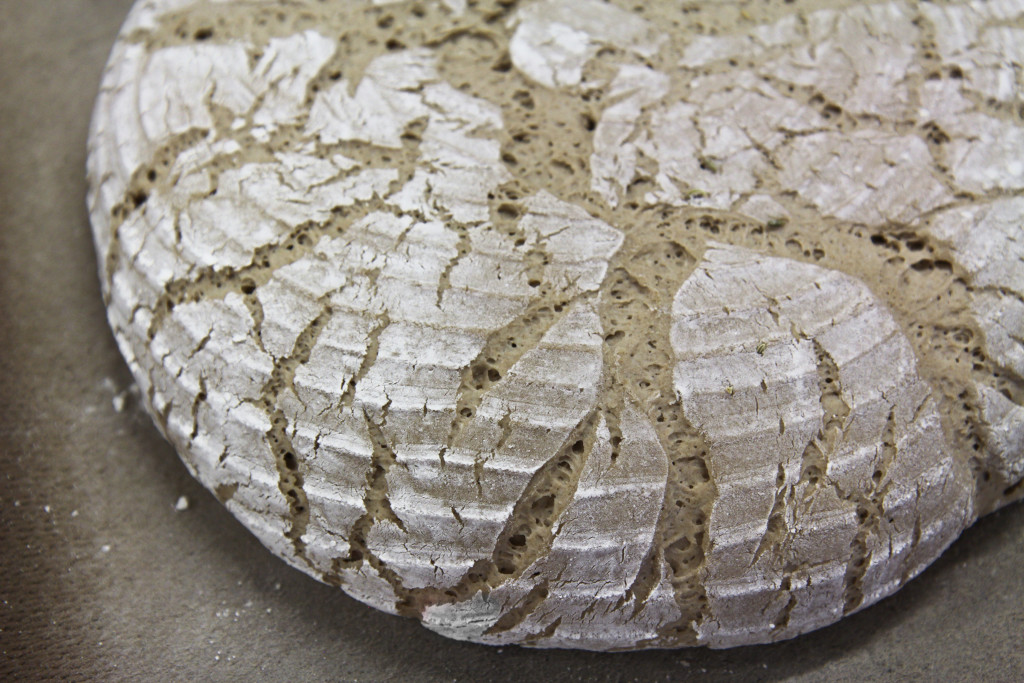
Just barely proofed
At this stage of the proof, small cracks (2-3mm) can be seen on the dough. When you remove the dough from the basket, small additional cracks appear on the surface. Once removed, the dough remains compact while resting and only slowly spreads outward.
TIP: If you put the dough in the oven at this stage, I recommend you lower the initial temperature from 260 to 240°C. This gives the dough more time to develop in the oven.

Effects of barely proofing on baked bread:
- Cracks in the crust on the sides above the bread’s base
- Uncontrolled and protruding cracks in the crust
- Uneven crumb with bulbous poring
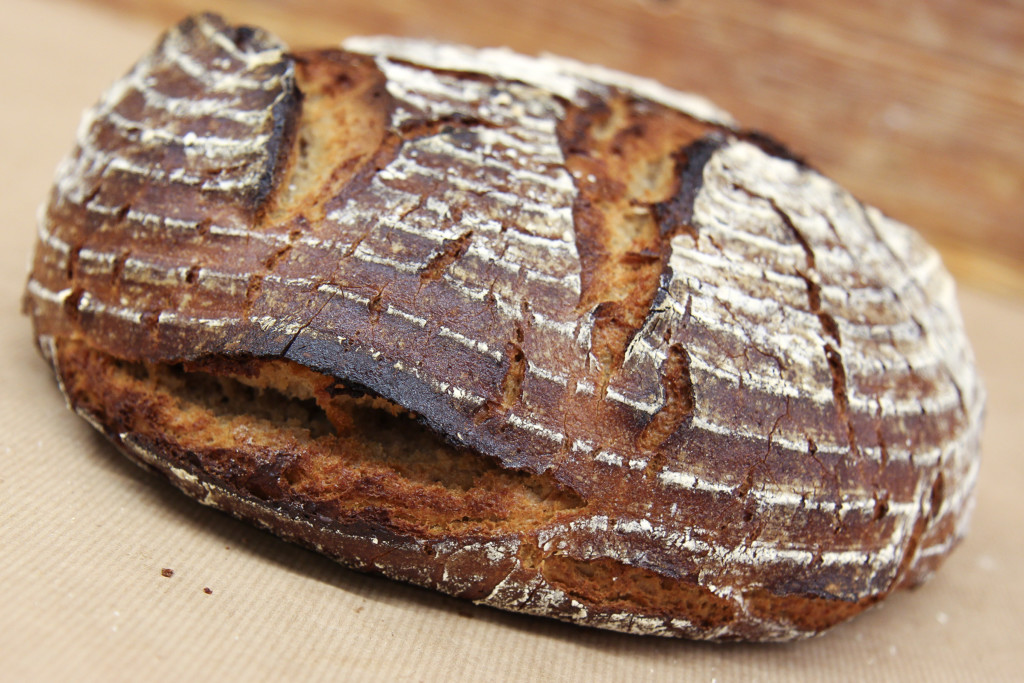

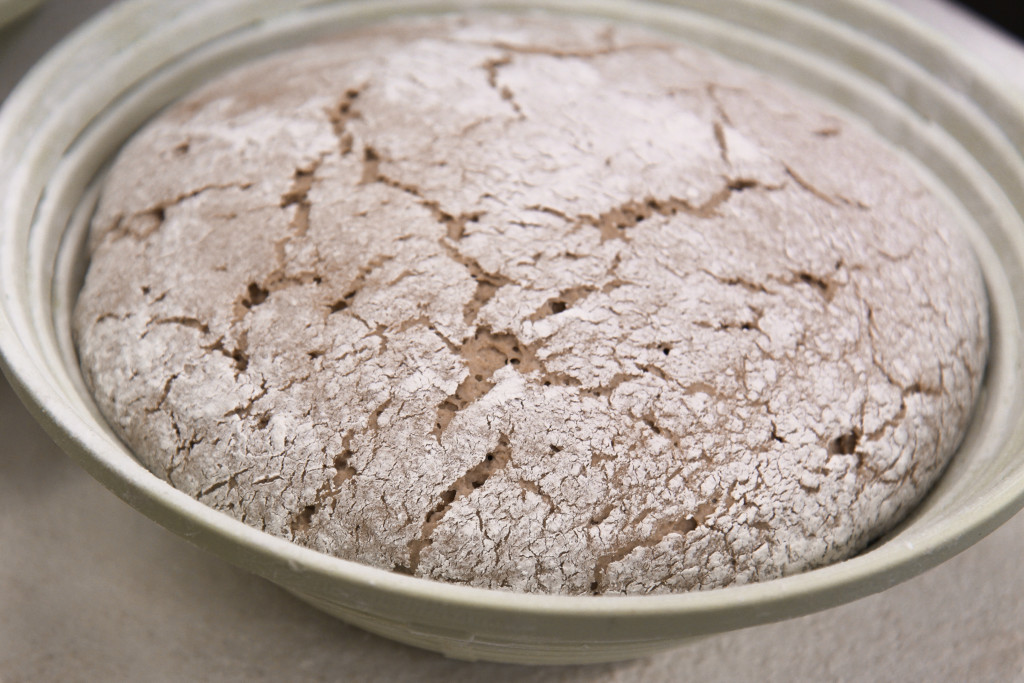
Fully proofed
Significant cracks (5mm) are visible on the dough’s surface. More cracks appear when the bread is removed from the proofing basket, and these grow markedly larger within minutes. This allows you to determine how intense you want the crust to look.
The dough spreads outward and downward while still maintaining its stable form.
In this stage of proofing, the steam can stay in the oven for at least 5-7 minutes of the initial baking phase without causing strong crack formation. By keeping the steam in the oven for one extra minute, you can spur a small but intense crack formation.


There are a number of things that can cause the ideal proofing time to vary:
Barely proofed:
- High dough temperature
- High amount of yeast
- Large pieces of dough to be baked
- Low baking temperature (oven turned on too late!!)
In all these cases, you should increase the amount of steam or extend the time that the steam remains in the oven.
Fully proofed:
- Weak souring of the sourdough
- Insufficiently matured sourdough (post-souring of the main dough)
- An overly hot oven
In these cases, you should reduce the amount of steam and the amount of time it stays in the oven.
Scoring and moistening the dough:
If you score the dough before baking, you need to adjust the depth of the score to the stage of the proofing. The fuller and more complete the proofing stage, the lighter the scoring must be.
A barely proofed dough calls for deep scoring. By opening the dough’s surface you can prevent underproofing. In contrast to wheat dough, rye dough should have minimal scoring. The reason is that its surface stretches only minimally as there is little volume increase in the oven. For long bread forms, 3-4 scores suffice.
It is important to keep in mind the height at which you tip the bread out of the basket! Setting the bread too forcefully onto the peel can cause the crumbs to thicken, especially in overproofed breads (the bottom third of the crumb is particularly affected).
Dough is often brushed with water before being baked. Moistening the dough’s surface with water makes it more elastic and therefore helps it achieve greater volume. Moistening the dough must happen before scoring or adding small holes (i.e. with a fork or roller).