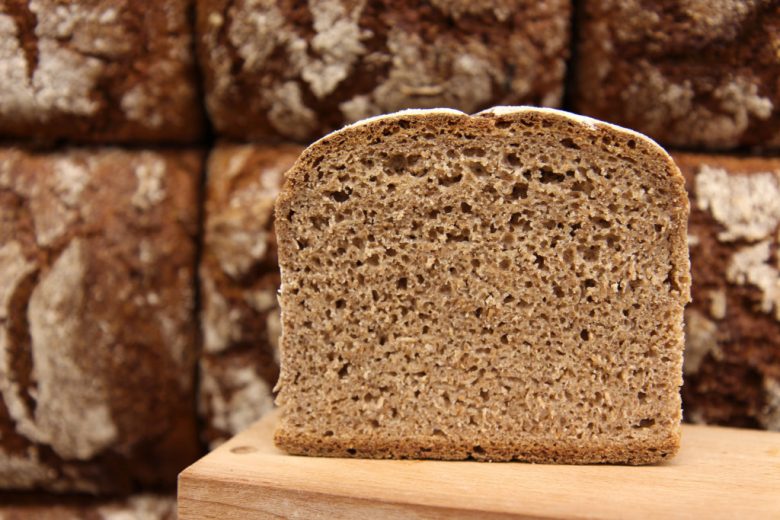
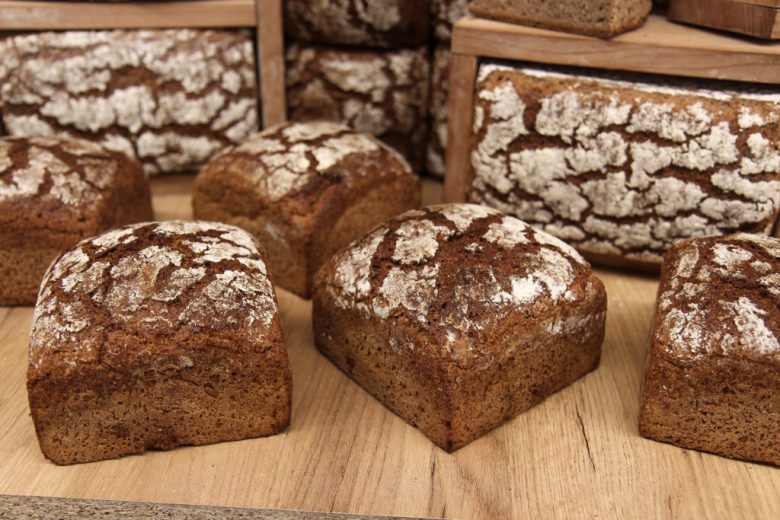

Apple Wholegrain Bread
A simple wholemeal bread should taste healthy and hearty, but it can sometimes be a long and hard way to get there! Most of the time I succeed in recipes right away, but this time the whole grain really drove me crazy. Again and again too sour, then again greasy, then extreme cracks in the crumbs and sometimes (if I’m honest – always) tough crumbs the next day.
When seeking good advice, then textbooks normally help but what I found there gave me even bigger and more severe bread mistakes. I have no idea how these wonderful illustrations of the breads in the books came about, but for me the uncertainty was even greater than before (for the first time I was able to empathize with some of the reader’s comments – pure despair!).
Can it really be so difficult to make a sourdough from a simple wholemeal flour, that can then be made into a dough that is still edible after a few days?
In order to minimize further failures, I started a series of experiments with different sourdoughs. In this series of tests, I mixed sourdoughs with different hydrations(TA), temperatures and amount of starter. In addition, the sourdough should mature at room temperature after being mixed!
Test series
Sourdough:
- Wholegrain flour + water + 10% Starter + 18hours/DT: 32°C = too sour
- Wholegrain flour + water + 5% Starter + 18hours/DT: 30°C = too sour
- Wholegrain flour + water + 2% Starter + 18hours/DT: 28°C = not sour enough
- Wholegrain flour + water + 5% Starter + 18hours/DT: 26°C = PERFECT
“All of the sourdoughs matured at a room temperature of 20°C”. The stated dough temperature (DT) was measured after mixing.
Mixing time:
- 30 minutes slowly/ leave for 30 minutes and then mix slowly for an additional 10 minutes (1% yeast was added during the second mixing phase).
- 20 minutes slowly/ leave for 20 minutes and then mix slowly for an additional 10 minutes (1% yeast was added during the second mixing phase).
- 20 minutes slowly/ leave for 30 minutes and then mix for an additional 7 minutes (0.5% yeast was added during the second mixing phase).
“The 3rd case brought the best result! Some will now ask what is with the yeast- I simply didn’t want to risk any additional souring during the proof- therefore 0.5% yeast!”
Improving the Shelf-life:
- Cooked rye berries
- Soaker or scald
- Soaked leftover bread
- Grated apple
TIP: Butyric acid fermentation can easily develop in soaker and scalds at temperatures around 35°C. These usually spoil the taste of bread in retrospect. This extraneous fermentation can be suppressed by slightly souring the soaker.
Mature soakers and scalds can be preserved by storing them in a cool place at + 5°C by adding a small amount of table salt.
You should use around 20-30% of the amount of flour for a soaker or scald. In the case of ground meal that is rich in enzymes, a soaker should be used instead of a scald. In addition, the proportion should be reduced to 15-20%.
ATTENTION: The parameters listed above relate exclusively to finely ground wholegrain flour!
Recipe
For a dough weight of 1980g
Sourdough:
- 400g Finely ground wholegrain rye flour
- 400g Water
- 20g Starter
The sourdough matures for 18 hours and should be kept at a temperature of 26°C. It should be monitored that the sourdough doesn’t get too cold on autumn and winter days.
Main dough:
- 820g Mature sourdough
- 500g Wholegrain rye flour, fine
- 100g Wholegrain wheat flour, fine
- 400g Water 35-40°C
- 80g Grated apple, fine
- 20g Salt
- 5g Bread spice (optional)
Mix all ingredients slowly for 20 minutes and the cover and leave for 30 minutes.
- 5g Yeast
- + Additional water if the dough is too firm (possibly 50g)
To ensure that the yeast is evenly distributed, it should be placed in a small well made on the top of the dough. Pour a small sip of water on the yeast – this will dissolve the yeast completely in the following 30 minutes and avoid any bread mistakes.
After a 30 minute break, the dough is mixed slowly for a further 7 minutes.
Work up:
- After mixing, clean the dough from the sides of the bowl and let mature, covered for 30 minutes.
- Then the dough is divided as desired.
- Form into a round loaf and immediately place into the baking form/pan.
- With yeast added the dough will reach full proof possibly after 45 minutes. If the yeast was left out the proofing time will at least double.
- Bake the pan loaves at 250°C with steam.
- Release the steam after 3 minutes (Leave the oven door open for 60 seconds).
- After an initial baking time of 15 minutes, the baking temperature is reduced to 190-200°C.
- The baking time should not be less than 90 minutes.
- To improve the crust development for pan loaves, the bread can be removed from the form after 60 minutes.
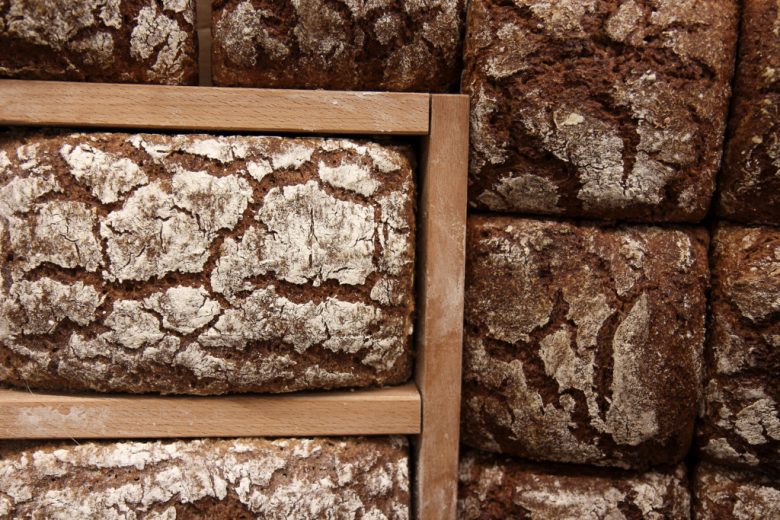
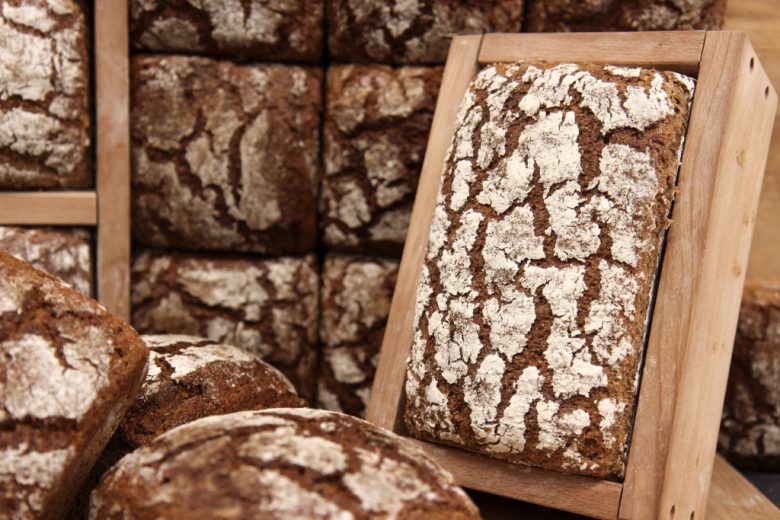
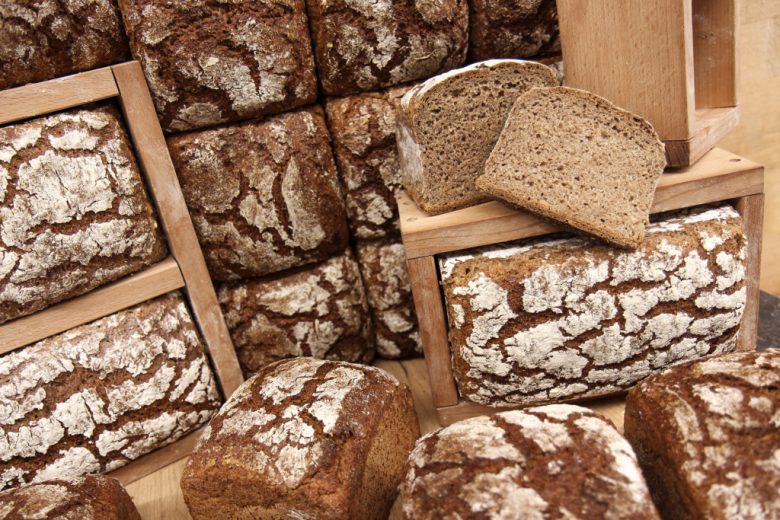
In addition I want to thank Angie for the baking forms. The baking forms I used came from her and can be found at Landhaus.de.